Looking for something to do on a lazy weekend afternoon? Here are some lovely DIY decorating ideas that will help you while away your time, while doing some useful home décor upgrades! No matter what your skill level is, and even if you’re on a shoestring budget, we’ve got inspiring ideas right here.
Let’s get started!
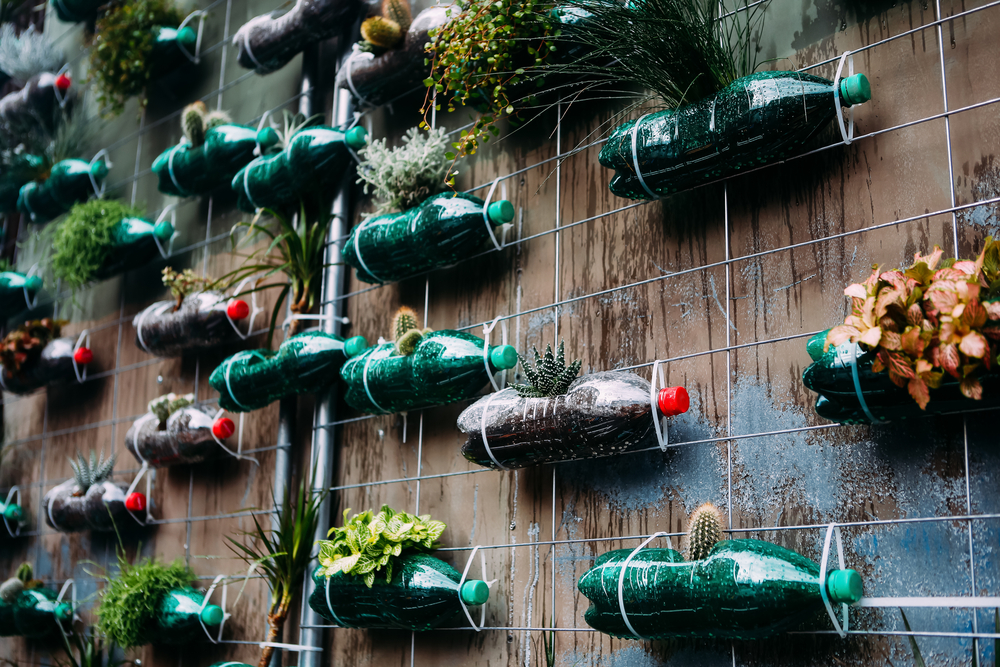
#1. Bottle Planters
Single-use plastic bottles are hard to avoid, but they don’t have to end up in a landfill! With a little dexterity, you can turn your used plastic bottle into a chic planter. Read on for how-tos!
- Place the clean, washed bottle on its side, and use a pair of sharp scissors to cut a rectangle out of the length of the bottle. Let the opening measure around 1.5 inches by 3 inches.
- You can use acrylic paint to decorate the bottle in any way you like, or you can leave it as it is.
- Punch a drain hole on the opposite side of the rectangle.
- Add pebbles just above the drain hole, and then fill the planter with potting mix.
- Gently transfer your plant with its roots into the potting mix.
- Find a spot for your planter, hang it up and enjoy the greenery!
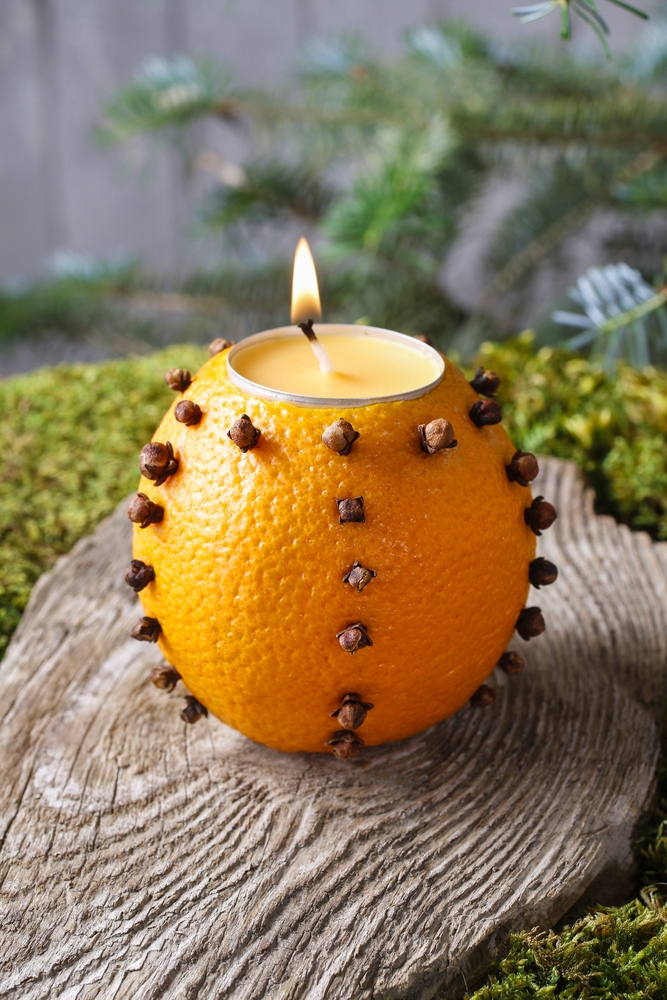
#2. Citrus Candles
Do you have almost-finished candle jars with a bit of wax left right at the bottom? Repurpose the wax in a new avatar and make citrus candles that smell like heaven! Here’s how:
- Cut a small circle off the top of an orange with thick skin, and scoop out the insides. (You can eat the pulp!)
- Remove the wax from your old jars, and melt it in a saucepan using a double boiler.
- Add a few drops of orange essential oil and stir.
- Place a wick inside the scooped-out orange and, holding it in place, pour the melted wax inside. Hold the wick vertical, till the wax solidifies around it.
- You can stud the orange candle with cloves, releasing their oils into the wax and adding to the smell.
- Enjoy your candle!
#3. Jute Rope Planter Pot
Dress up your plastic or terracotta pot with jute rope, and give your plants a pretty new look!
- Using a glue gun, stick one end of the jute rope at the bottom of the pot.
- For the first few loops, use plenty of glue and ensure that every bit of the rope is secure.
- Keep winding the rope around the pot in loops, turning the pot around as you work your way up to the top, so that the entire surface is covered with rope.
- When you reach the middle section, you will not need to glue every bit down. Just add some glue at intervals.
- As you near the top, you’ll again have to glue two or three full loops all the way around.
- Loop the top inside of the pot till the level of the soil, so that the original pot isn’t seen at all.
- Cut the end of the rope and stick it down, once finished.
- You can weave smaller strips of rope vertically at regular intervals, gluing the ends as before to hold the rope in place.

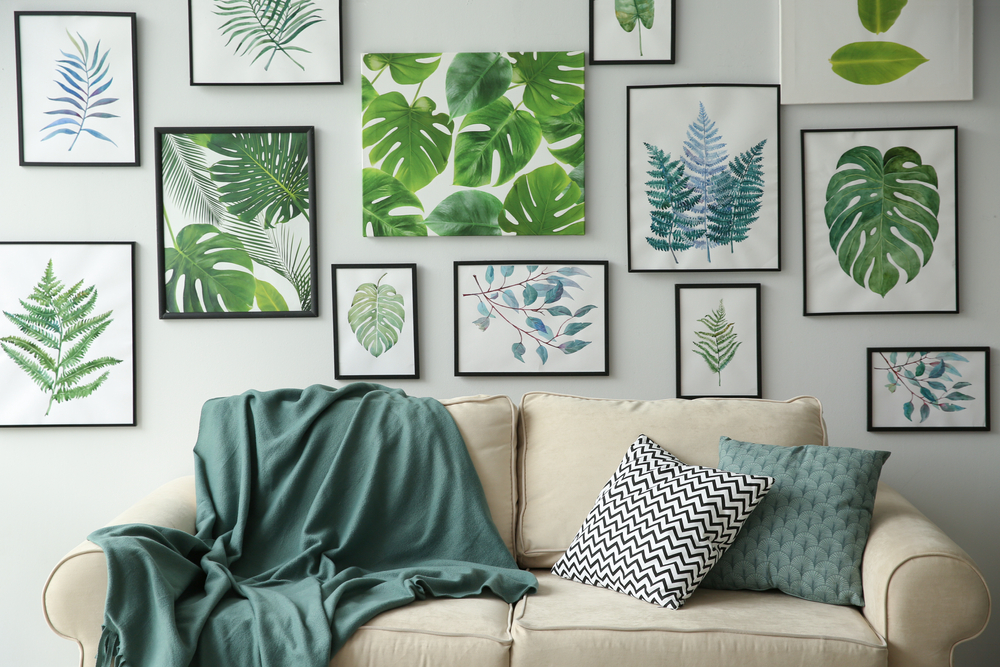
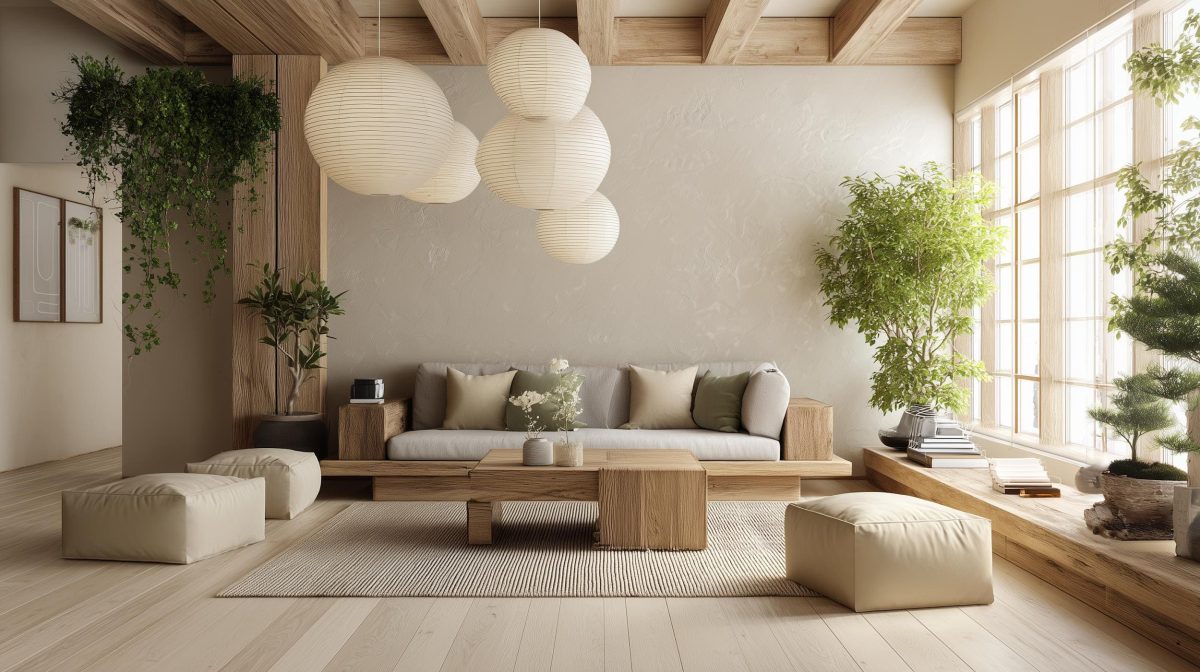
#4. Biophilic Art
Biophilic design is very popular now, and with good reason, too! It creates a sense of harmony between the indoors and the outdoors, and helps to bring us closer to nature. If your child is interested in painting, you can help her to create a gallery wall with leaf prints done in acrylic paint. Here’s how!
- Collect leaves with interesting profiles and shapes.
- Choose leaves that are fresh and pliable.
- Place the leaf flat on a newspaper, and use acrylic paint to paint the surface of the leaf.
- Gently flip the painted surface onto your canvas, and press down till the print of the leaf is transferred completely.
- You can carefully complete the painting by using watercolours or a black ink pen.
- Frame your canvas with a simple black frame to allow the beauty of the leaf to shine through!
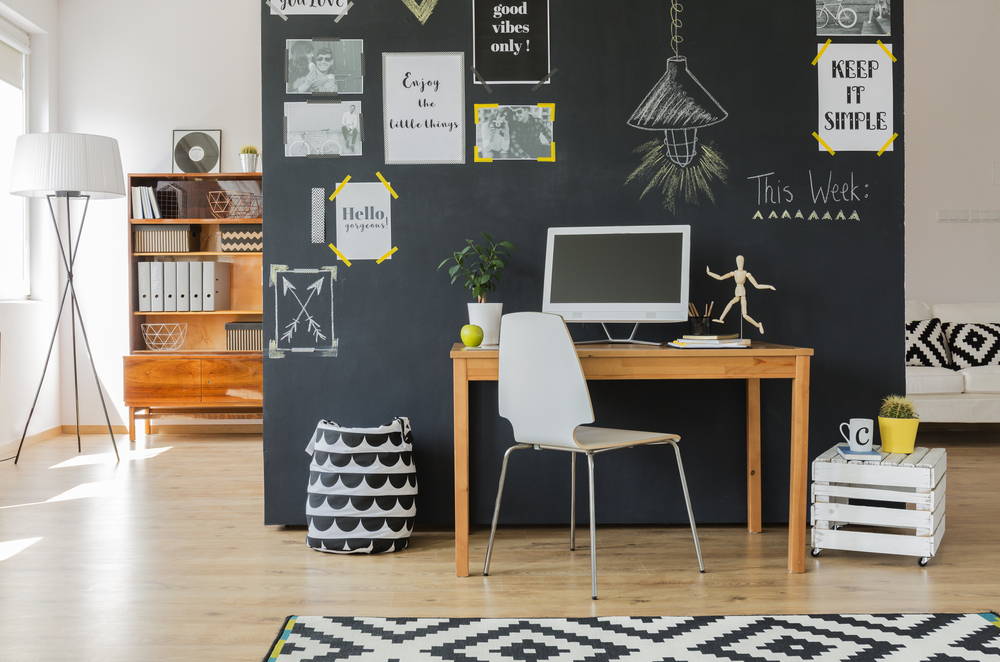
#5. Chalkboard Wall
Chalkboard paint is a great way to transform a room, and it’s a very easy DIY project that can be done by just about anyone. A chalkboard wall promises hours of fun — the paint turns the wall into a canvas, on which you can create new chalk doodles every day!
- You’ll first need to sand down the surface of the wall you want to paint, to ensure that its perfectly smooth and has no bumps.
- Use a flat brush and apply at least two coats of the chalkboard paint you are using. Remember, it does not have to be black! Chalkboard paint is available in several dark shades.
- Leave the paint to dry completely. This can take as many as three whole days. Once its dry, rub chalk over the entire surface and then erase completely with a dry microfiber cloth.
- Your chalkboard is ready for use! You can get as creative as you’d like—use it for To Do lists, doodle quirky cartoons, tape up posters on it, or even leave notes or messages for your family where they can’t miss it!
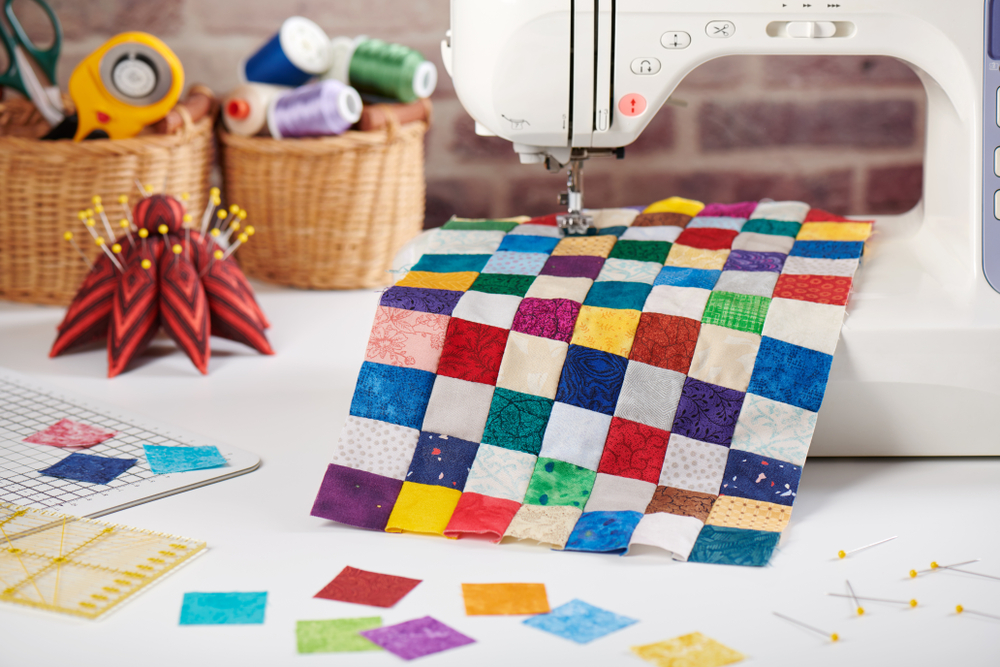
#6. Upcycle Old Fabrics into a Quilt
If you’re handy with a sewing machine, this is something you’re sure to love! Don’t give away old clothes that hold special memories or have sentimental value. Instead, upcycle them into a lovely personalized quilt that holds a treasure trove of memories! You’ll have to cut the fabric into 4-inch squares and hem each piece separately before patching them all together. You can alternate dark and light colors, or mix and match prints to get a pleasing combination of patterns and hues.
Loved these ideas? We can’t wait to see what you’ve created in your own homes! But if you find that DIY just isn’t your thing, then do turn to the HomeLane team for professional help with your home décor. We’re always here to help!


 EXPLORE MORE