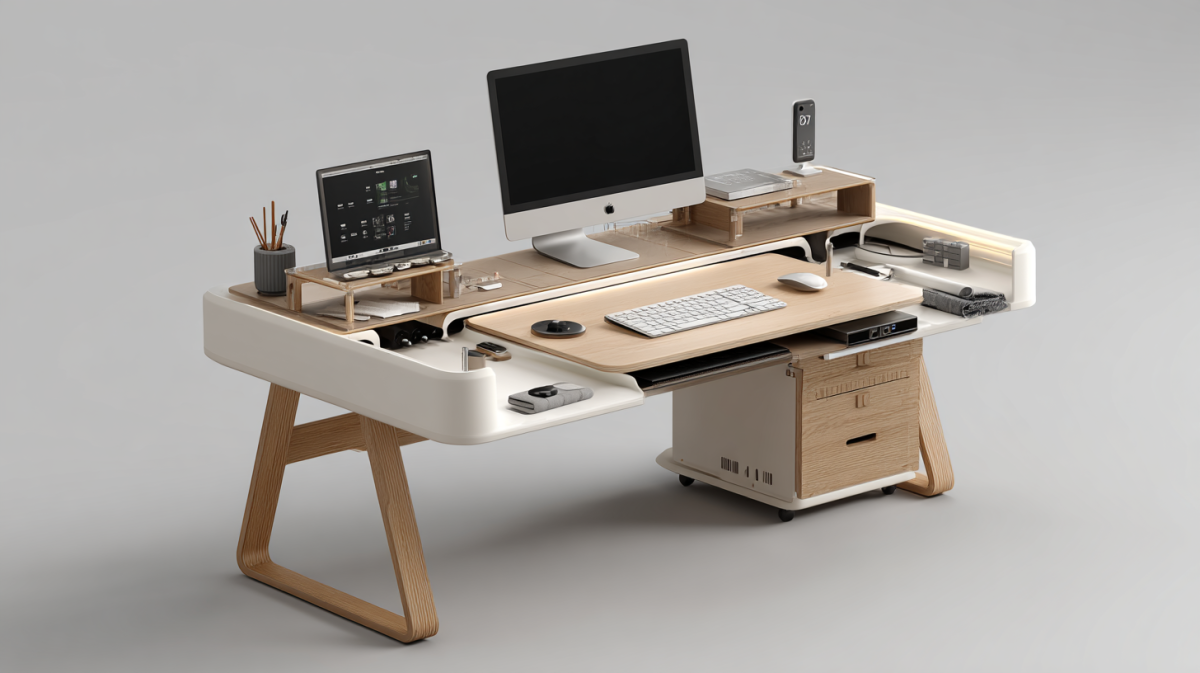
The pandemic has transformed our workplaces, and the work-from-home culture has taken strong root across organizations everywhere. With companies like Twitter allowing their workforce to continue remote working forever—and many other companies following suit— it’s clear that home office designs are here to stay! We’re here to help you organize your home office through some fun, creative DIY projects. Let’s get to work!
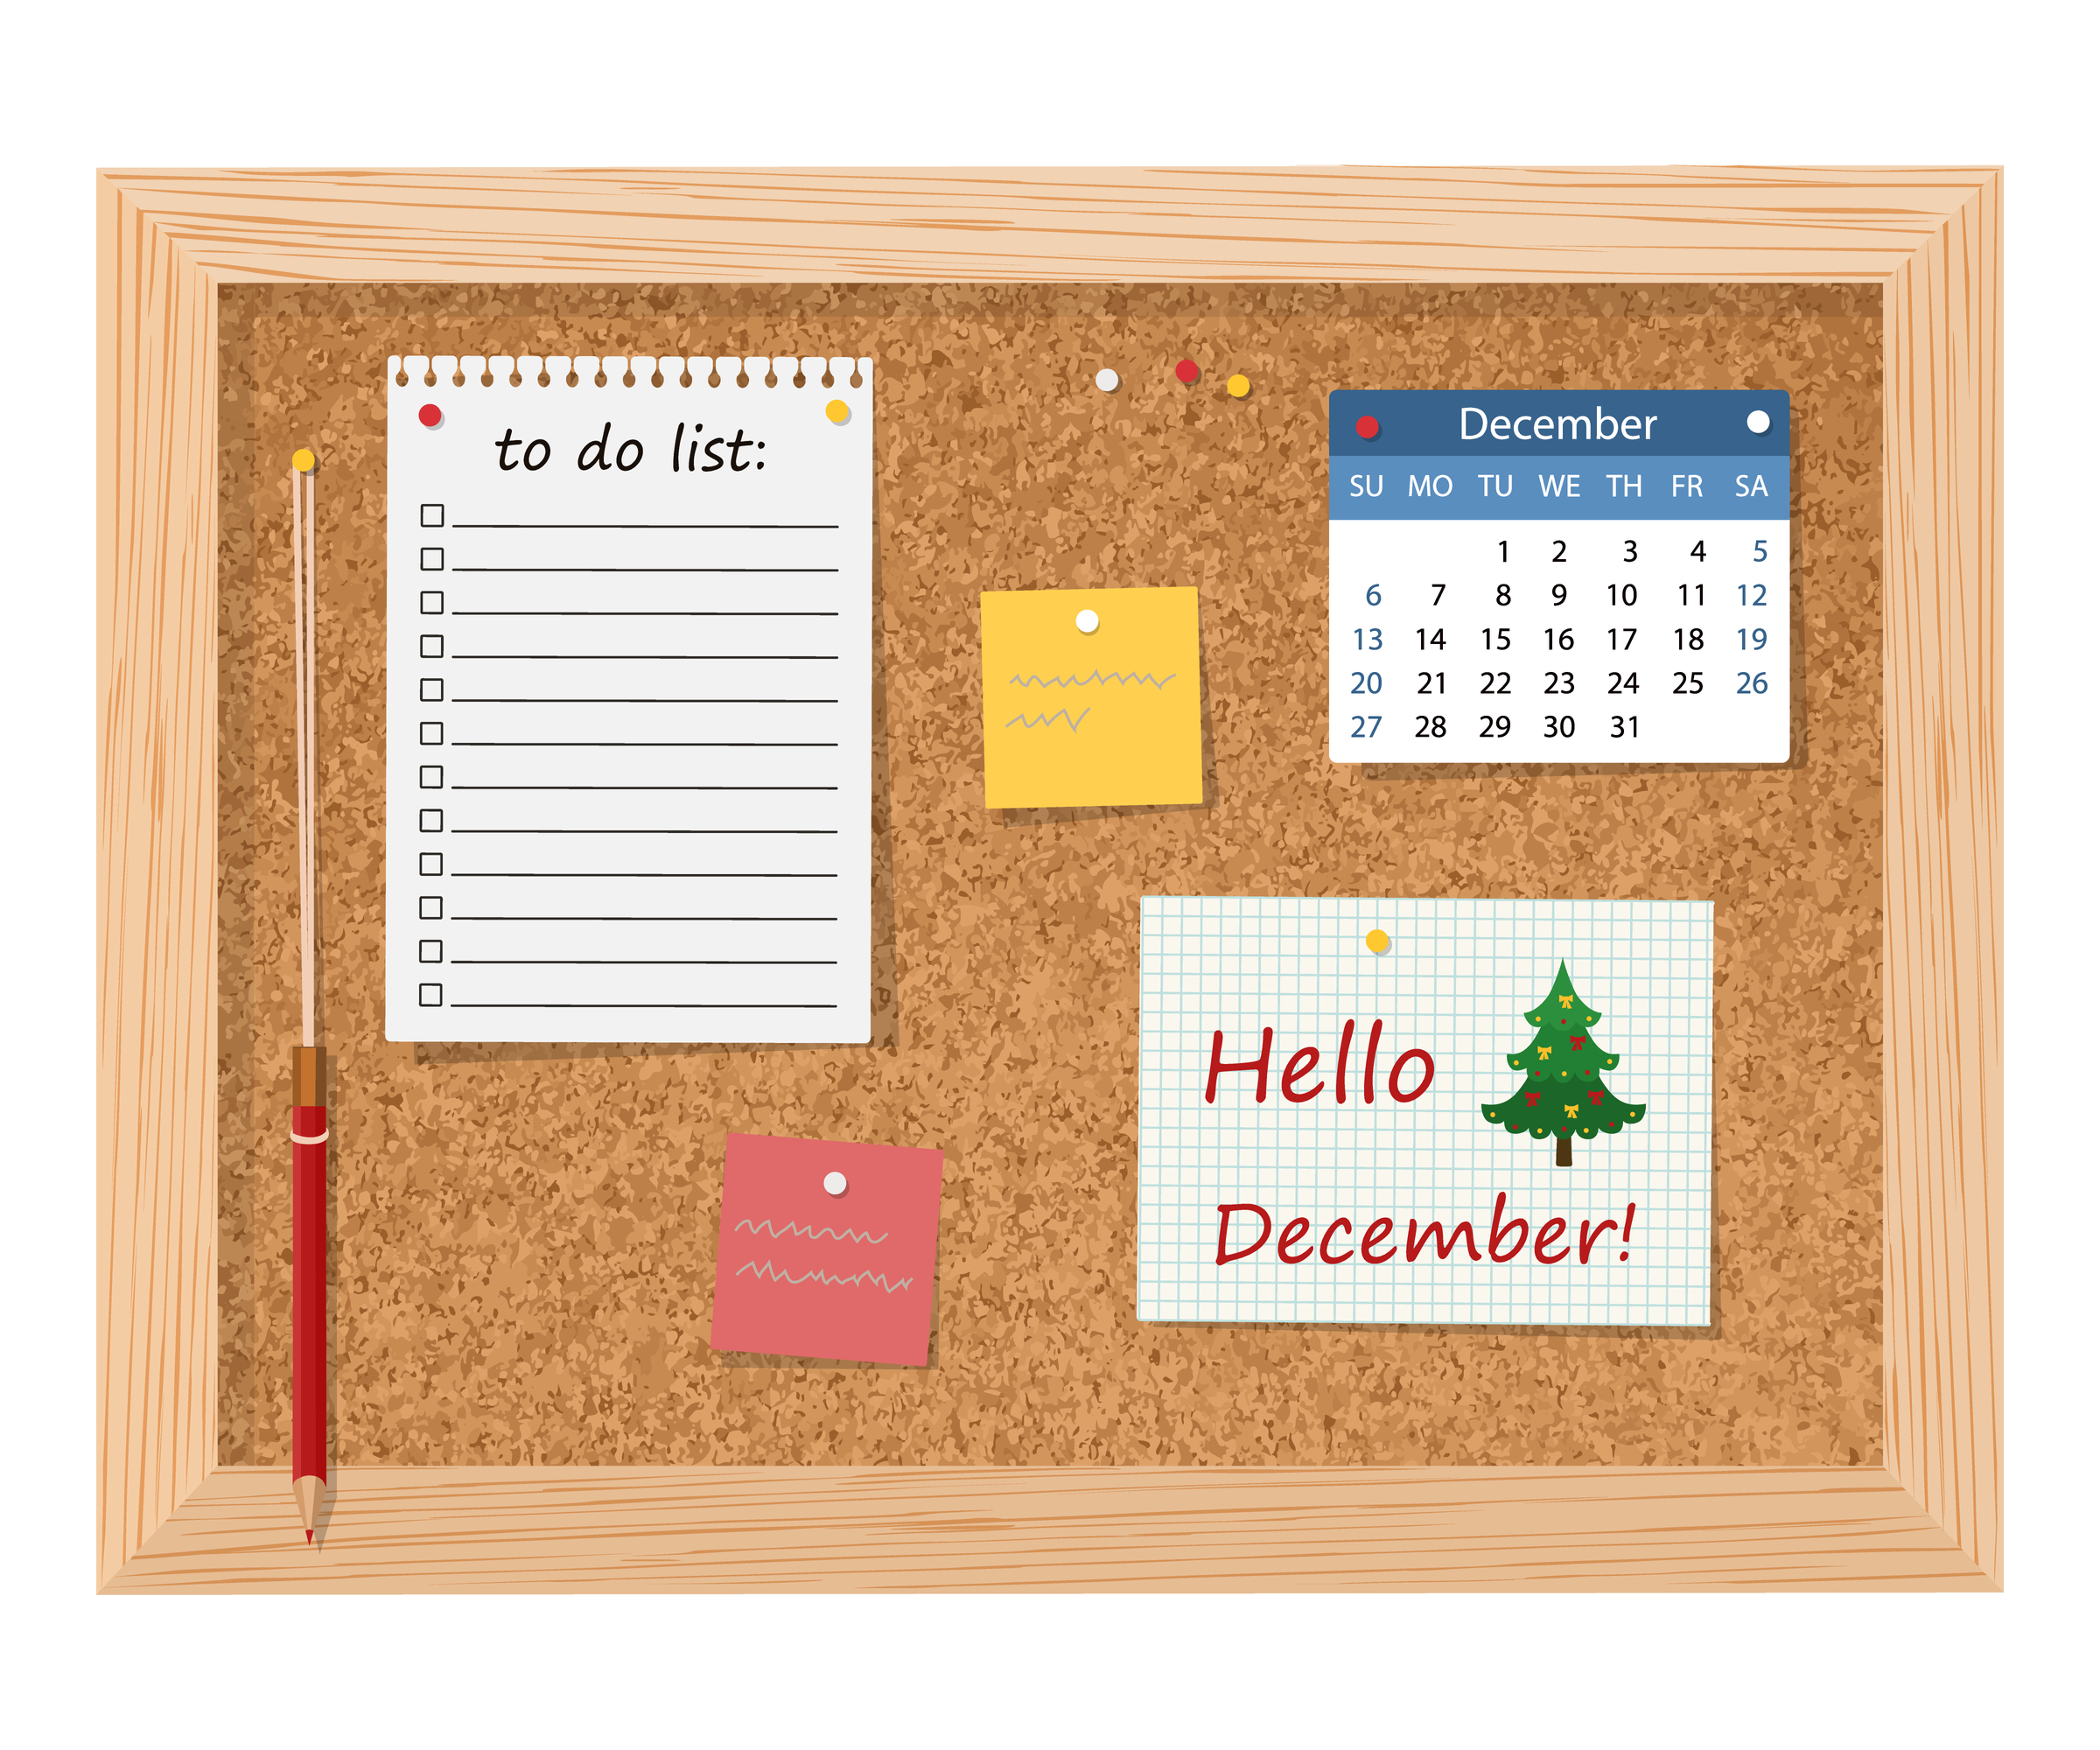
Project #1. Cork Pin Up Board
Convert an old frame and corkboard into a useful Bulletin Board that you can use to organize your lists and reminder notes.
You’ll need:
- Corkboard of around 2 feet by 3 feet, or any size you wish
- Flat wooden picture frame of the size you need
- Fevicol or glue
- Cardboard backing in case cork sheet is not sturdy enough
Method:
- Remove the glass from the picture frame.
- Cut the cork sheet to fit snugly inside the frame.
- Insert the cork sheet where the picture is usually fixed.
- Hang the picture frame on the wall next to your home office.
- Start pinning up your notes!
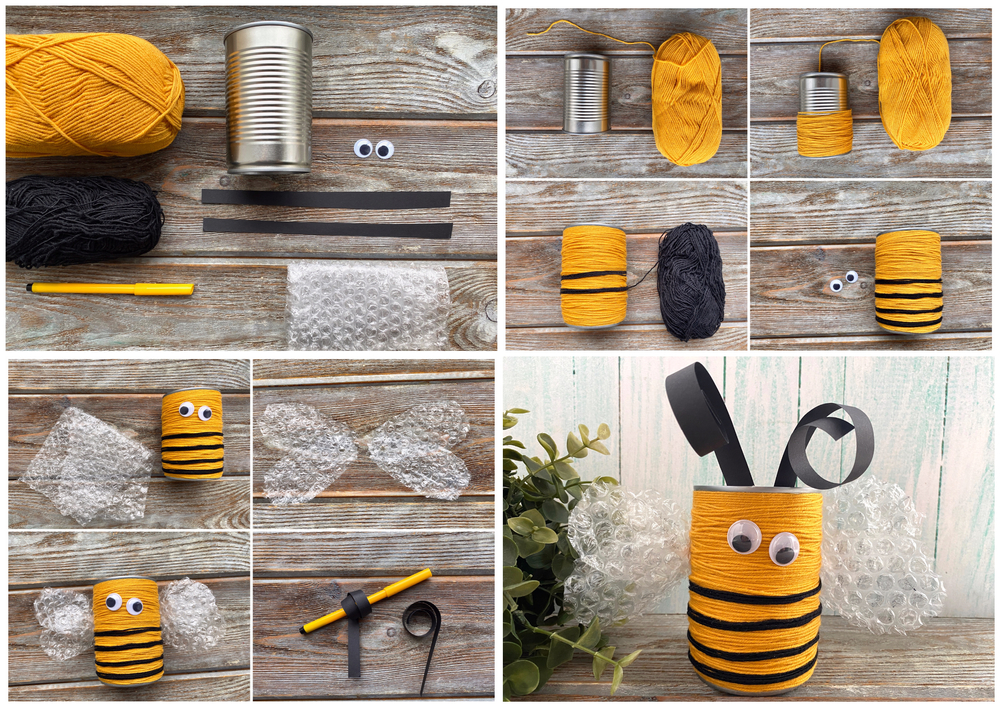
Project #2. Bumble Bee Pencil Holder
This pencil holder adds cheer and colour to your work desk!
You’ll need:
- Empty tin
- Yellow and black wool
- Two plastic eyes
- Glue
- Bubble wrap for wings
- Black paper strips for antennae
Method:
- Wrap the yellow and black wool around the tin can as shown in the picture below. Tie the ends and hide the knot under the top layer so that it is not visible.
- Cut out the bubble wrap in the shape of two wings and attach at the back.
- Glue the eyes on.
- Curl the ends of the black paper strips around a pencil, and glue the straight end on the top of the can.
- Your bumblebee pen holder is ready!

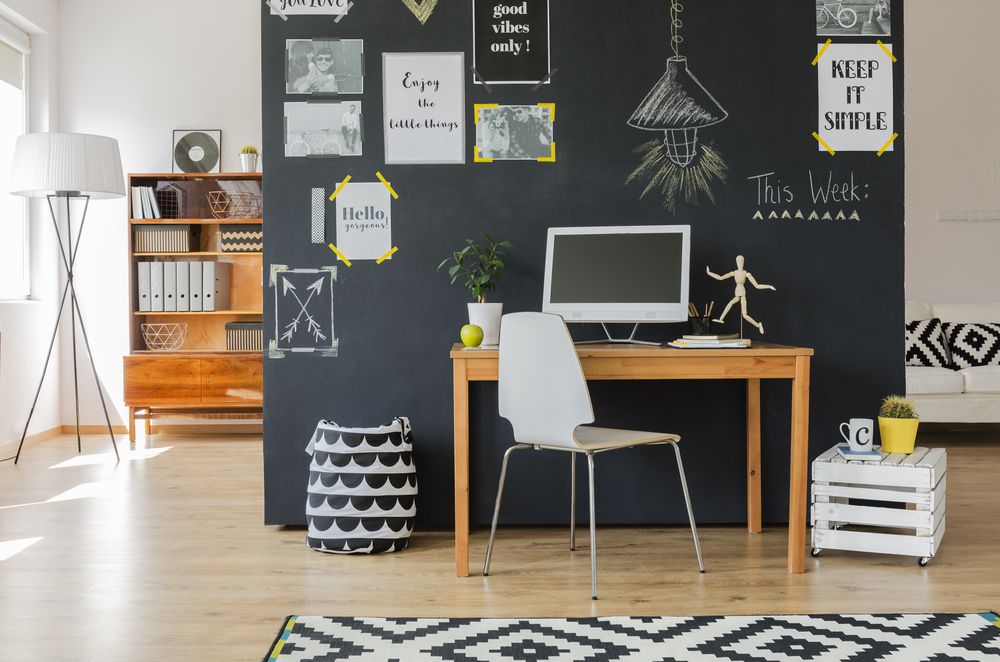
Project #3. Chalkboard Wall
An accent wall in black chalkboard paint adds a dramatic touch to your home office. Chalk out some cool scribbles on it to let the world know that genius is at work!
You’ll need:
- Black chalkboard paint
- A flat brush
- A roller brush
- Chalk
Method:
- Vacuum the wall to remove dust and prepare it for the chalkboard paint.
- Cover the floor with newspapers to prevent accidental splashes.
- Using the flat brush, paint in even strokes to cover the wall.
- Use a roller brush to even out the surface, in case your strokes are visible.
- Allow to dry before you start scribbling!
Note: if the wall is damaged or uneven, it might need prep like primer and putty work to even out the surface. Take the support of a professional painter if you are not too confident about doing this on your own!
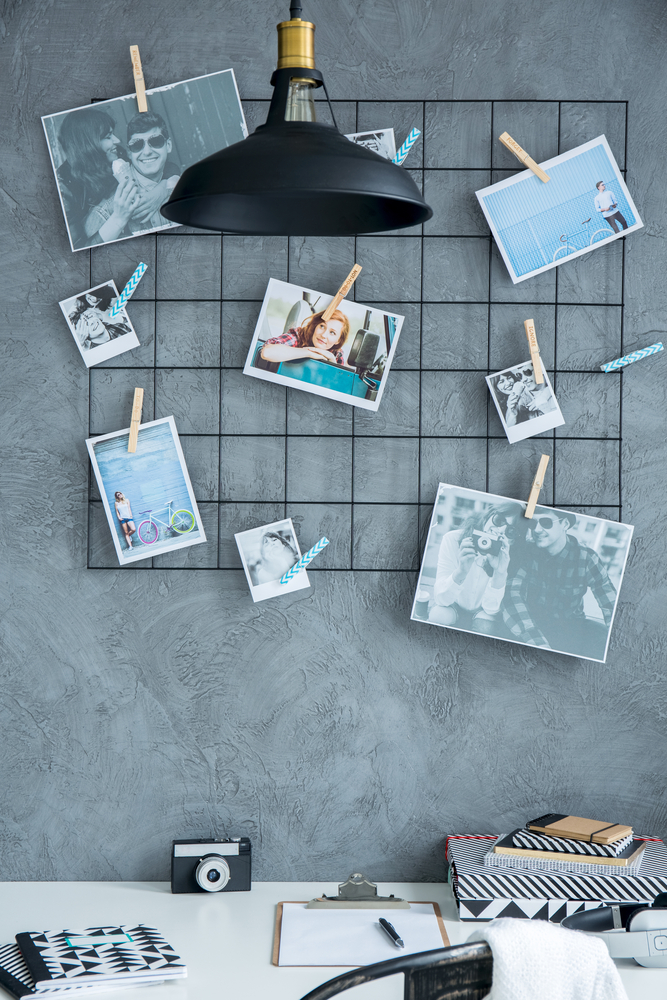
Project #4. Metal Wall Grid
A metal wall grid looks super cool, and is perfect for pegging up pictures and posters or anything else you can think of!
You’ll need:
- Metal wire
- Pliers
- A doorknob(or other strong support) to wrap around the end of the wire to straighten it
- Pegs or clips to hang up stuff
Method:
Watch this video tutorial for stepwise instructions.
- Wrap one end of the wire around a doorknob, stretching it out till it’s a straight piece.
- Cut 2 feet lengths of the wire using the pliers.
- Set out the pieces of wire flat on the floor on top of a newspaper, and use super glue to fix the wires together, as seen in the video.
- Leave the grid overnight to dry.
- Hang it up on the wall and start using it!
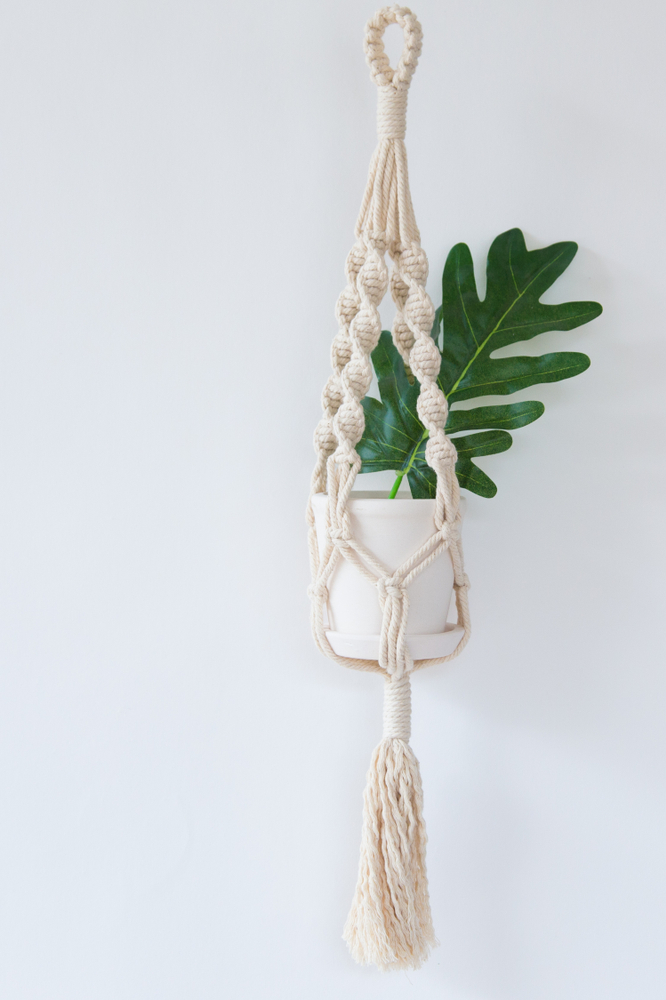
Project #5. Macrame Plant Hangers
Plants are a great way to add some life to your home office, even on the most dreary of workdays! If there’s no space on your desk, hang them from your window frames or cabinets with these easy to make macramé plant holders.
You’ll need:
- 3 mm macramé cotton string
- Metal ring 7 cm in dia
Method:
Watch this video tutorial for stepwise instructions. You will need to know how to make a gathering knot, square knots and half square knots. This tutorial can help get you started, even if you’re an absolute novice!
- Cut eight pieces of the cotton string to a length of 12 feet each.
- Loop the strings through the ring. You will now have 16 lengths of string.
- Create a gathering knot to secure the loops together, as shown in the video.
- Use 4 strings that are close together and make 18 square knots to weave them into a branch.
- Do the same with the next 4 strands to make the second branch.
- Continue making branches with every 4 strings, till they are all used.
- To finish with the first branch, create twisting half square knots until the length of the twisting knots exactly matches the length of the square knots that you first created.
- Finish all the remaining 3 branches in the same way. You will now have 4 branches.
- Complete the potholder by making a net for the pot. Use alternating square knots.
- Close the net at the bottom with another gathering knot.
- Using sharp scissors, trim the fringe to the desired length.
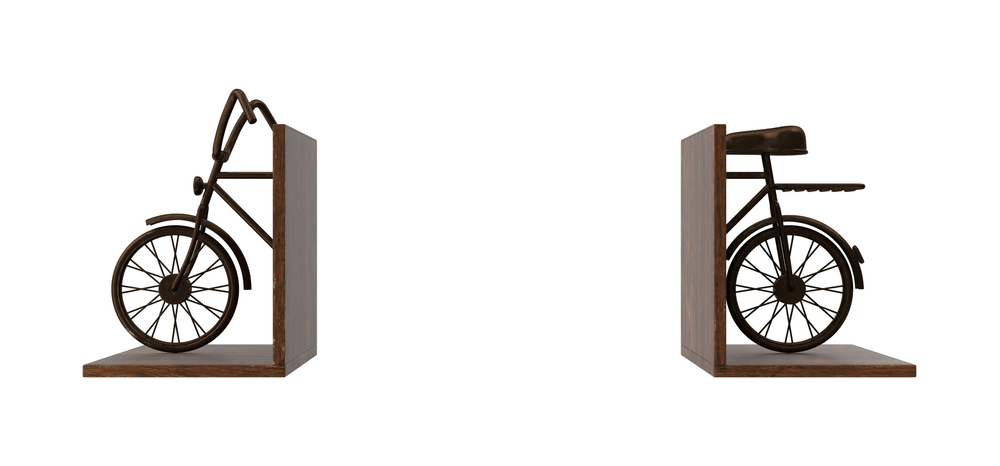
Project #6. BookEnds
Get crafty and make these delightfully simple bookends that can add a touch of whimsy to your collection of office books!
You’ll need:
- Four pieces of veneered wood, about 9 inches by 9 inches and finished on all sides
- A toy model of any vehicle
- Hacksaw blade cutter
Method:
- Using a hacksaw blade cutter, cut the toy vehicle exactly in half.
- Glue the wood squares together in an L shape as shown
- Glue each half of the vehicle to the wooden L, mirroring the L so that the bookends appear as shown in the image below.
- Clean up all the ends and wipe off excess glue.
- Leave the bookends to dry!
Do you have any other DIY ideas for your home office that you’d like to share with our readers? Do write in, and let us have your comments below! For more home décor ideas, get in touch with HomeLane.


 EXPLORE MORE